Our Starlink installation guide will help you properly assemble and set up the system and get the best out of the service.
Installing and setting up a new satellite internet can be a hassle.
Thankfully, SpaceX designed Starlink for the do-it-yourself (DIY) installation and setup.
Whether you want to become a professional Starlink installer or just want to install your dish, this article is for you.
Table of Contents
Required Tools
The required tools vary depending on where you want to install the dish. However, the most commonly used tools are:
- A plier
- A harmer
- Set of screwdrivers
- An iron clip
You may also need a pipe adapter to easily mount the dish on the pole or pipes. The list can be longer, depending on preferred mounting methods.
Starlink Installation Instructions
Download Starlink App
Starlink offers an app that is crucial from the initial setup of Starlink to managing the system after installation.
Therefore, before you start the installation, the first thing is to download the app.
The app is available on Google Play or Apple Store for free. Downloading and installation are just like you would download any other app.
Check For Obstructions
The next step is to locate the right spot for your dish, and the app will help you scan for obstructions.
Simply open the app, and you will see the obstruction tool on the home page.
When you click the “Check For Obstruction” button, it will open your phone camera, allowing you to check the field of view.
Follow the on-screen instructions as you look for the right location.
The dish should face the direction with a clear field of view-around 100 degrees of the sky.
Unpack the Starlink Kit
Once you find the right spot for your installation, unpack the Starlink kit and verify if it has all the necessary components. The kit comes with:
- Rectangular/Square Starlink dish with an antenna
- Wireless Router
- Mounting Base
- 75 ft Starlink cable for residential or 82 ft for business
- Router Cable
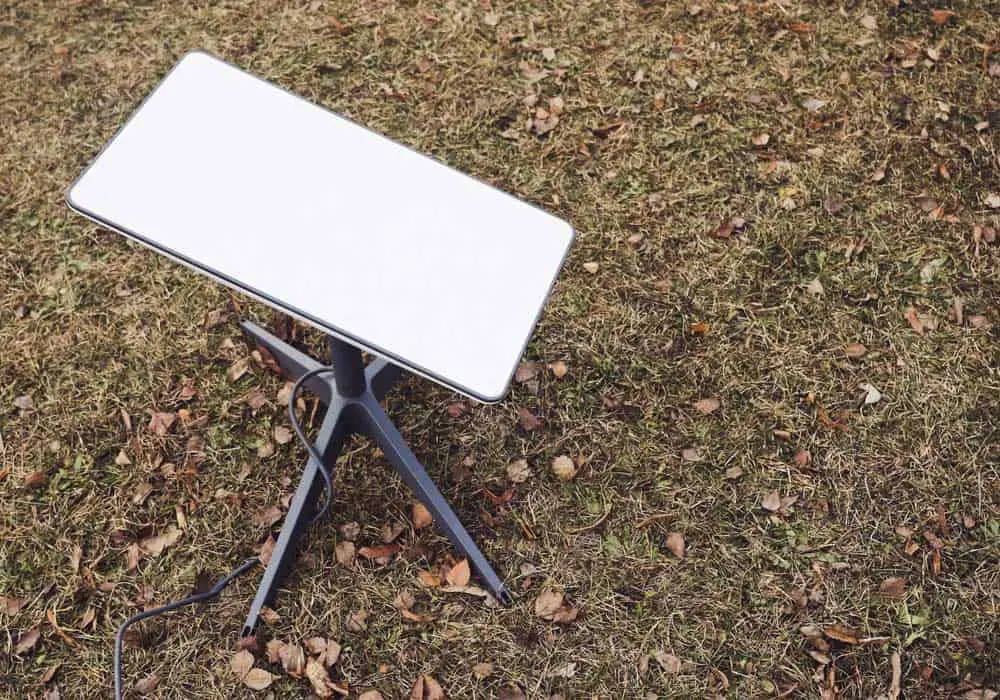
Starlink rectangular antenna receiver standing on the ground.
The kit’s mounting base may not be ideal for your mounting method. You can get a separate mount depending on where you want to mount the dish.
However, if the included mount base is enough for you, you can use it for permanent or temporary mounting.
We will use the included mount base for this guide because every additional mounting option has its unique procedure.
You can browse our website to learn how to install various Starlink mounts.
Assemble the Dish and Install It
The first step is to connect the 75 ft data/power cable to the dish through a connection located near the bottom of the mast.
The cable has two connector sides with different shapes: straight and elbow-shaped connectors.
It is the straight connector that will go into the dish. The elbow side will connect to the router.
The cable should be well-seated on the mast. Then fix the mast into the mounting base.
Ensure the two spring tabs perfectly lock into place. You should also mount the dish where it is free to rotate.
Do the Router Wiring
Getting the Starlink cable into your house to connect it to your router may require work, depending on how you get it in.
For instance, you may get it in through ventilation or the wall, which will mean drilling a hole.
Whichever the case, you need to route the other end of the 75 ft Starlink cable to your router. Plug the elbow shape end of the cable to the router at the bottom.
Then connect the router power cable to the power supply. The dish will also power up once you connect the router to the power.
Connect to Starlink
Once you power the router, it will start an initialization process. At the same time, the dish antenna will begin to search for the satellite to connect to.
The initialization process will take some time, so just wait a few minutes, then open the WiFi settings on your phone.
The antenna will also take about 15-20 minutes to find a satellite to connect. Wait until you see STINKY and connect to it to proceed.
If the connection is successful, you will see a window asking you to configure your settings. You will create a new name and a password.
Configure Starlink Router
On your phone WiFi settings, tap the Starlink hotspot. You will be prompted to fill in your WiFi name and password.
You can use the name and the password you created before.
Manage the Connection Using the App
Once you complete the configurations, open the app to check the status of your connection. If the status indicates “Online,” your installation is successful.
If the status is “Offline Searching,” the dish is still trying to find a network. Just give it some time.
However, if the connection status is Disconnected or stays Offline for some time, it means there is a problem.
You can tap “Support” for help or try our troubleshooting tips to correct the issues.
How to Become a Starlink Installer
Installing Starlink can be a great step towards a money-making venture.
Many purchase Starlink services and look for professionals to help them set it up.
As a professional, you must know everything about Starlink installation and creating wall-to-wall WiFi in houses.
Like any other business, you must register as a Starlink installer.
Once you register, you will get listed in the Starlink Professional Installer Directory.
This will make customers easily find you since it has a map entry where a new customer can search for a Starlink installation service near me.
FAQ
Do I Need an Installer to Install Starlink?
SpaceX sells Starlink as a DIY product. However, it requires the proper installation to get the best network.
For that reason, you may need a professional installer to help.
How Much Does it Cost to Install Starlink?
After purchasing Starlink hardware equipment at $599-$2,500, the installation is free if you do it yourself.
If you use a professional installer, the charges may vary depending on the individual.
After installation, you will pay a monthly fee of $110 for residential, $135 for RV and $500 for Business plans.
How Far Can You Install a Starlink Dish from Your House?
Starlink offers a 150 ft extension cable that can go up to 150 feet from your house. If you need more length, use a Starlink Ethernet adapter.
The device will enable you to extend the signal to your house wirelessly.
Final Thought
SpaceX designed Starlink for a DIY installation, and this process is very straightforward.
We offer Starlink installation tips that will walk you through the process and even help you if you want to become a professional installer.
For more information, you can contact Starlink operators on their official website.
