Starlink helps loads of remote areas access the internet. Yet, there is a problem. Starlink port forwarding is not possible.
Per Starlink’s response, Starlink does not support port forwarding.
While you might think of it as a problem, Starlink’s lack of support for port forwarding is a security measure.
Even better, there are ways to port forward on Starlink to get remote access.
Let’s explain why Starlink port forwarding is challenging and how to bypass it.
Table of Contents
- What is Port Forwarding?
- Is Starlink Port Forwarding Possible?
- What is CGNAT?
- How To Port Forward Easily On Starlink
- Bypass CGNAT on Starlink
- Conclusion
What is Port Forwarding?

Remote communication through port forwarding
In essence, port forwarding falls under network address translation(NAT). NAT allows the sharing of a public IP address.
Port forwarding is where communication requests are assigned a unique identifier(port) and forwarded through a router or firewall.
Assume you have computers in different locations. Imagine you want to access computer X from your computer Y.
You’d have to get remote access. However, your computer Y has to send a request through a router for Computer X to allow access.
Your computer sends the request with a port number.
This port number informs Computer X to send any requests that come with that specific number to your computer.
Single Port Forwarding
Single port forwarding needs you to first assign static IP addresses to the devices you intend to forward.
You set up individual services within the network, one by one.
Single port forwarding is common in organizations that use web servers, email services, and other cloud services.
Port Range Forwarding
Imagine you want to allow access to web servers or online gaming servers. You have to set up services within a range of ports.
That way, devices can get access through specific ports only.
Is Starlink Port Forwarding Possible?

Port forwarding on Starlink enables remote access.
Starlink port forwarding is technically possible IF you use an aftermarket router.
Port forwarding enables private communication within a network. It keeps out foreign traffic. In an organization where data is extremely sensitive, it helps to keep your internal communication secure.
However, the main reason why Starlink port forwarding is hard is Starlink uses CGNAT.
What is CGNAT?
During the early stages of the internet, each computer was supposed to have a unique IPv4 address.
After all, there was no way we could exhaust all 4 billion IPv4 addresses, right?
Wrong.
The addresses quickly started running out.
With limited supply comes a sharp increase in demand and price.
Carrier-Grade Network Address Translation(CGNAT) solves the problem of a limited supply of public IPv4 addresses.
Internet service providers reserve IP addresses and assign private IP addresses to individual devices in a network.
Still, CGNAT comes with disadvantages.
Since traffic from multiple users looks like it is coming from a single public IP address, it can be difficult to pinpoint network abuse.
Also, it makes it hard for applications that require multiple IP addresses, such as online gaming and P2P networking.
Starlink issues IPv4 addresses using CGNAT.
Since the addresses are ever-changing(dynamic), it becomes hard to configure port forwarding.
Bypassing CGNAT would enable you to port forward on Starlink.
How To Port Forward Easily On Starlink
In an ideal setting, the easiest way to port forward on Starlink would be to get an IPv6 address.
However, that option is currently limited. Starlink is just starting to explore the option of issuing IPv6 addresses.
Still, there are other alternatives to port forward easily on Starlink.
Use ngrok
Ngrok is an access service allowing users to broadcast their private devices online.
It acts as a secure tunnel to your private server. It’s an easy alternative for port forwarding that would allow other users remote access to your device.
The best part is that ngrok works with Starlink.
Here’s how you deploy ngrok.
- You have to install ngrok
- Run the command that starts the tunnel.
- Define the access port.
- You will be provided with a specific address to access your device from outside the network.
Port Forward Easily on Starlink with a VPN
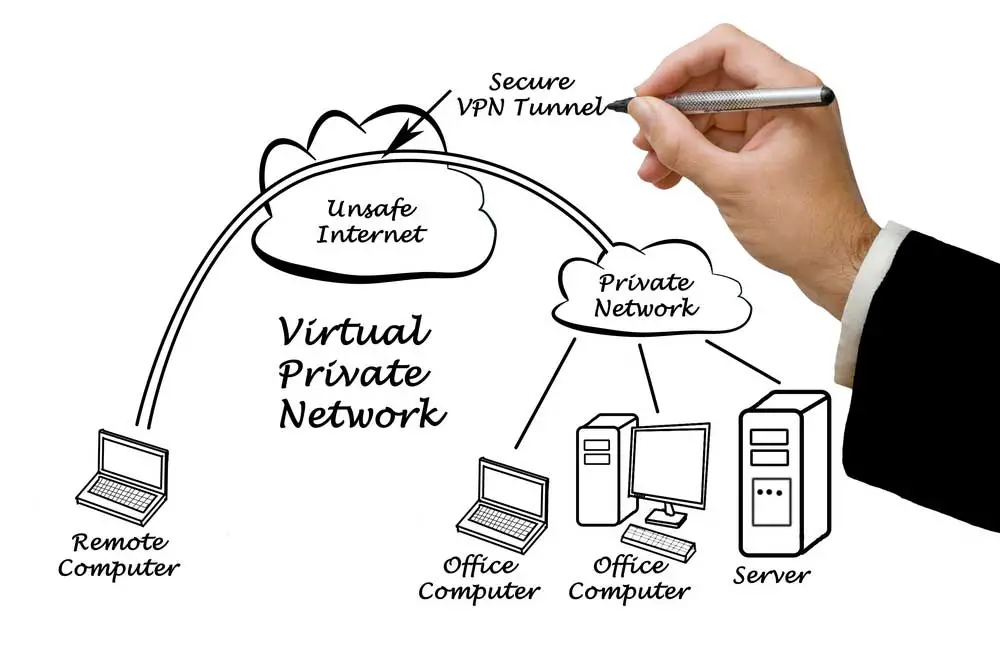
This is how a safe VPN connection works
We recommend using a reputable VPN service to port forward on Starlink.
A VPN creates an encrypted pathway where your information passes before it is disbursed on the public internet.
It’s a staple for anyone who would like to bypass firewalls or other stringent measures that limit access.
Starlink works with a lot of highly-recommended VPNs to port forward.
We have included a simple CGNAT bypass process when using a VPN.
Here is an example of how to enable port forwarding. For this case, we will use PureVPN, a VPN that works with Starlink.
- Log in to your PureVPN member area.
- Go to the subscriptions tab and click on Configure.
- Go to ENABLE SPECIFIC PORTS.
- Input port settings
- Click apply settings and wait for the settings to take effect.
Bypass CGNAT on Starlink
Starlink uses CGNAT, meaning you will encounter some of the abovementioned issues. Fortunately, there are ways to bypass CGNAT on Starlink.
IPv6 Addresses
First off, Starlink does not support IPv6 addresses. At least not the 128-bit IPv6 addresses.
However, you can still get IPv6 support with a third-party router.
You must be in an area that supports IPv6 access and get an IPv6-compatible router.
It’s a good thing there are highly reputable routers such as Netgear and Asus.
Here’s a short rundown on how to set up IPv6 for Starlink
Requirements
- Starlink router
- IPv6-compatible third-party router
- IPv6-compatible operating system
- Ethernet adapter
Before setting up IPv6 for Starlink, enable bridge mode on your Starlink router.
- Go to your third-party router’s web interface.
- Click Advanced Setup in the advanced settings.
- Select the connection recommended by Starlink.
Note: Different routers have different configuration processes.
Bypass CGNAT using VPNs
Most VPNs support CGNAT bypassing and, by extension, port forwarding.
- First, get a VPN with port forwarding support.
- Install the VPN on your devices.
- Finally, configure the VPN to enable port forwarding.
Your VPN service will issue you with a static address that bypasses CGNAT.
However, this option comes with latency issues.
You can expect slow traffic since it has to be routed back and forth from your devices to your router and VPN, then back.
Get Starlink for Business
For businesses and heavy consumers, Starlink for business is a worthwhile option to bypass CGNAT.
You’ll still get IPv4 addresses, but Starlink issues you with a static IP.
You can port forward on Starlink for business if you combine it with a third-party router.
FAQ
Q: How do I know if my Starlink is CGNAT-enabled?
A: It’s right to assume your Starlink is already CGNAT-enabled. Still, you can verify. You can visit websites that check your public IP, such as whatismyip.com or whatismyip.org.
Alternatively, go to your command center and type ipconfig. Your IPv4 address is displayed there.
Q: Will Bypassing CGNAT on Starlink improve your online gaming?
A: Multiplayer online games rely heavily on traffic exchange.
CGNAT on Starlinks denies access to incoming traffic.
Therefore, bypassing CGNAT makes it possible for you to game.
Conclusion
Starlink enables a strong internet connection where there is none or coverage is minimal.
However, it is limited by self-protection protocols such as CGNAT and IPv4 address issuing.
Bypassing CGNAT and enabling port forwarding makes it easy to enjoy services that require remote access, such as video conferencing, online gaming, CCTV monitoring, and data backup.
